Nowadays, drones are becoming more and more popular and are widely used in various industries, such as photography, detection, search and rescue, agriculture and so on. Drones are widely used, and today, we'll take a look at a single component of the drone that is crucial to its function - the drone PCB. If you are a fan or expert of drone technology or interested in drone circuit boards, then it is necessary to read this article. Because learning how to design a drone PCB is the foundation for building an effective drone.

In this practical guide, I will define a drone circuit board, its relevance, its type, and provide you with instructions on how to create one. And I will also introduce you to PCBasic, an outstanding manufacturer of drone circuit boards.
What is a Drone Circuit Board?
A drone circuit board, otherwise known as a drone PCB, is one of the most important parts of a drone’s electronic system. Just like every drone has a singular computer, it is equipped with a printed circuit board, which serves the purpose of holding and wiring every single part of the drone together, such as motors, sensors, cameras, and communication systems. The PCB drone guarantees that all components function concurrently towards providing stable flight, accurate positioning, and rapid information processing.

A drone PCB Board intricacies depend on the specific type of drone and its purpose. To illustrate, a basic drone usually employs a simple drone PCB. In contrast, commercial and industrial drones may require sophisticated drone PCB designs that incorporate multiple layers together with Integrated Circuits (ICs) which are highly advanced.
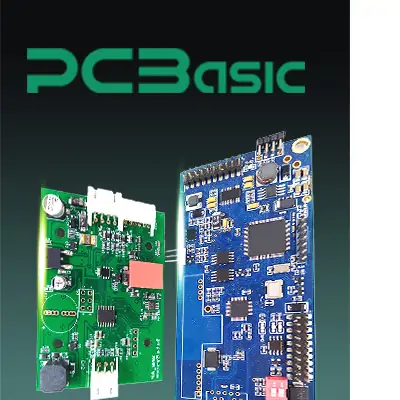 About PCBasic
Time is money in your projects – and PCBasic gets it. PCBasic is a PCB assembly company that delivers fast, flawless results every time. Our comprehensive PCB assembly services include expert engineering support at every step, ensuring top quality in every board. As a leading PCB assembly manufacturer, we provide a one-stop solution that streamlines your supply chain. Partner with our advanced PCB prototype factory for quick turnarounds and superior results you can trust.
Why Use a Drone Circuit Board?
The drone PCB is crucial for several factors:
Centralized control: The drone PCB is the primary hub of the circuitry, and as such, it is the heart that connects and controls all the electronic devices.
Compactness: The drone PCB design allows the drone to be compact and lightweight, which translates to better performance for most drones.
Reliability: Quality drone circuit boards guarantee stable and reliable operation even in harsh conditions.
Customization: Custom drone PCB designs give the user freedom to customize the functionality of the drone to particular needs.
What are the Different Types of Drone PCB?

These drone PCBs are classified by applications:
1. Single Layer PCB: This is the simplest form of drone circuit board and is suitable for drones that operate at a basic level and have few components.
2. Double Layer PCB: this drone PCB is flexible enough to be used in more advanced hobbyist drones.
3. Multi-layer PCBs: These are commonly utilized in sophisticated UAVs. These can integrate complex circuitry in high-performance applications with their multi-layer designs.
4. Multifunctional drones: These drones are compact and foldable and utilize lightweight and flexible drone PCBs and hence utilize flexible PCBs.
5. Rigid-flex PCBs: These can be employed in uniquely designed sophisticated drones due to their hybrid nature of rigid and flexible PCBs.
Components on Drone Circuit Board

In totality, a drone circuit board contains several components, each serving a specific function to ensure the proper operation of the drone:
1. A microcontroller is a component in the drone that processes most of the data and has control over all the other functionalities.
2. A gyroscope and an accelerometer are used to stabilize the drone and keep track of its orientation. They are both types of sensors.
3. The drone motors are regulated in speed and direction respectively by Electronic Speed Controllers (ESCs).
4. The PDB (Power Distribution Board) is responsible for powering every part of the drone by distributing the power from the battery.
5. The GPS module allows for establishing the drone's location and for navigation.
6. The remote control is used interchangeably with the drone, and the communication module acts as the facilitator.
7. The camera module is what allows the drone to take videos and pictures.
8. The BMS (Battery Management System) tracks and controls the power source of the drone and ensures it operates properly and safely.
How to Make a Drone PCB?

Creating a drone circuit board that will be used in a drone requires a lot of planning and an appropriate design methodology. Here is a step-by-step guide on how to drone PCB that is customized according to your needs.
Step 1: Define the Requirements
Every design process must begin with defining goals and functionalities, in this case, the type of drone you want to design. Consider its primary motivation, dimensions, weight, and what parts it will include, like motors, sensors, cameras, etc. The information will relate to what type of drone PCB you need: single-sided, double-sided, multilayer, or even flex, and what parts you will need.
Step 2: Create a Schematic Design
The schematic diagram serves as the outline of the drone circuit board. It is possible yet tedious to do it using Altium Designer, KiCad, Eagle, or other professional PCB design software. You should first place the components in the schematic, then define the connections between them, and explain the function of each part with clear labels and comments. The order to achieve intended functioning of drone PCB in fact is set.
Step 3: Construction of the PCB Layout
The schematic diagram now translates into a drone PCB layout. Positioning the microcontroller at the center allows optimal signal distribution, while power distribution board should be placed at the battery connectors. In addition, try to arrange sensors in the low interference zones and motors with ESCs close to each other.
Direct traces should be short and straight, while power traces should be separated into low and high power to eliminate noise. For multi-layer boards, the layer stackup should be defined together with via placement. To guarantee that the layout follows manufacturing limitations, a Design Rules Check (DRC) is run.

Step 4: Choosing The Material Of The PCB
FR-4 can be used to make the rigid boards of the drone PCB, while polyimide is more suitable for flexible boards and designs. After polyimide, High-Tg FR-4 is great for high-temp environments. Pick a material considering its thermal conductivity, mechanical strength, weight, and other aspects.
Step 5: Creating Gerber Files
When sending the design out to be produced, include the parts files. Polylines in paths and Gerber files are used by manufacturers to construct PCBs. The files include the board layout, copper layers, the solder mask, the screen print files, and drill files. Be sure to create the board outline and copper and silkscreen and drill files with appropriate Gerber files before transferring to a drone circuit board factory.
Step 6: Prototype the PCB
Prototyping allows you to test the design and catch problems before mass production. Work with a reputable drone circuit board manufacturer like PCBasic to create the prototype. Review the prototype to look for imperfections and evaluate it to guarantee correct power allowance, signal integrity, and component functionality.

Step 7: Assemble Components
After the prototype is signed off, solder the parts into the drone PCB. Employ Surface Mount Technology (SMT) for smaller elements and Through-Hole Technology (THT) for larger elements. SMT components are soldered with a soldering iron, and THT components are reflowed in an oven. Check for physical joining problems on the completed board to confirm all components are properly connected.
Step 8: Examine the PCB Functionality
Test the drone circuit board to make applicable changes as needed or verify that it does what it is supposed to do. Check for shorts and favorable voltage levels in a power-on test. Verify signal integrity with an oscilloscope and check that every component works as intended. Mimic realistic conditions validate that the PCB can handle the stresses of its intended application.
Step 9: Install the PCB in the Drone
Once the drone PCB clears all the examinations, integrate it with the drone's frame. Apply screws or glue to secure the PCB and add all parts, such as motors, sensors, and cameras. Arrange the cables carefully to prevent them from coming loose or causing interference.

Step 10: Testing and Calibration
To prepare the drone for use, it is important to do the final testing and calibration. Set up a flight test to check for controllability and responsiveness. Adjust sensor calibration and software configurations for best results. The rest of the test is done to check if the drone functions safely and effectively in an actual environment.
Following this guide helps you step by step to achieve the design and manufacturing of a top-quality drone circuit board that you wish to have. If you want to have professional help, consider working with a reputable drone circuit board factory like PCBasic which has knowledgeable staff, modern technology, and trustworthy manufacturing services for drones.
PCBasic: A Reliable and Professional Drone Circuit Board Factory

PCBasic is a reputable and expert drone circuit board factory that provides complete services in designing, prototyping, and producing drone PCBs. With many years of expertise, PCBasic is the industry leader in custom-designed drone PCBs for aerial hobby drones to sophisticated industrial drones.
With AI-ready equipment, PCBasic offers the best-quality service for drone PCB manufacturing or any project PCBasic chooses to undertake. The use of automated optical inspection (AOI) and functional testing guarantees performance with stringent testing protocols.
Meeting the needs of clients, PCBasic provides customized solutions and offers flexible terms of service that adhere to projects of any scale. For both emerging and existing firms, PCBasic’s affordable and top-tier drone PCBs make their aspiring ideas a feasible reality. PCBasic delivers guaranteed results when it comes to manufacturing drone circuit boards. Get in touch via the website for more information or to get a quote.

Conclusion
The process of designing and manufacturing a drone circuit board is complicated but very satisfying. When you break down the parts, kinds, and procedures necessary to make the high-end drone PCB, it is a whole lot simpler.
PCBasic is honored to partner with businesses and hobbyists who are searching for a highly skilled drone circuit board factory. With PCBasic's state-of-the-art technology, immense experience, and total dedication to your satisfaction, you can trust PCBasic with all your drone PCB manufacturing requests.
Check their website today for more information about PCBasic's services or to ask for an estimate.