Global high-mix volume high-speed PCBA manufacturer
9:00 -18:00, Mon. - Fri. (GMT+8)
9:00 -12:00, Sat. (GMT+8)
(Except Chinese public holidays)
Global high-mix volume high-speed PCBA manufacturer
9:00 -18:00, Mon. - Fri. (GMT+8)
9:00 -12:00, Sat. (GMT+8)
(Except Chinese public holidays)
HomePage > Blog > Knowledge Base > PCB Hole Types: Counterbore VS Countersink
There’s a functional difference between countersink and counterbore; however, both are types of holes drilled into workpieces like printed circuit boards (PCBs). The use cases and differences are the focal points of this counterbore vs countersink article.
A counterbore is a standardized tool for creating perpendicular surfaces for fastener heads on non-perpendicular surfaces. In other words, a counterbore hole is a cylindrical hole with a flat bottom that is larger and coaxial to a cylindrical hole just below it.
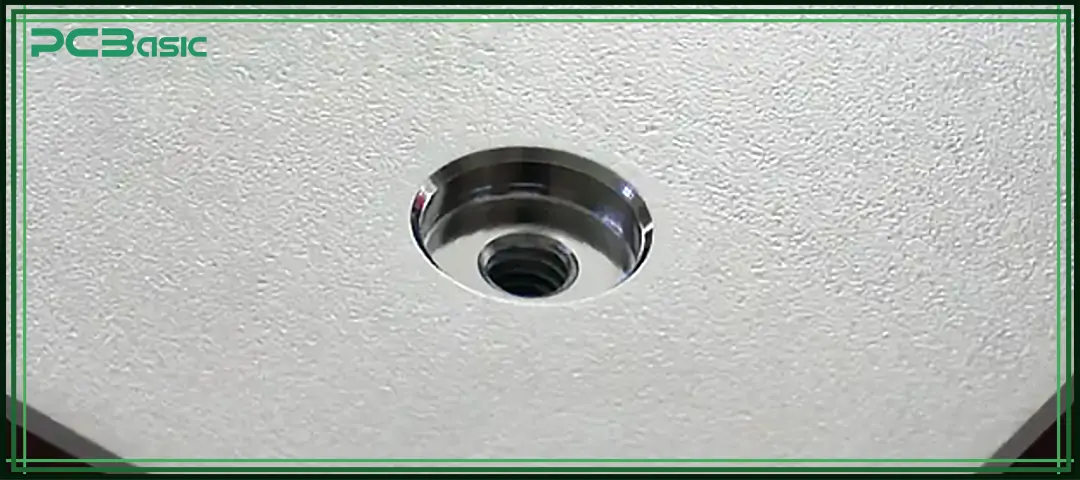
Its primary use is to accommodate fastener heads like fillister head screws and socket head screws, so it is perfectly mounted below or with a workpiece, e.g. PCB. Welders often use a counterbore hole in machining processes that require precision, creating clean, smooth, and aesthetically finished surfaces.
In most cases, a counterbore hole is essential in assembling components that require flush mounting, such as in the automotive, electronics, and aerospace industries. It also creates allowance for bolts and screws in furniture, always resulting in a smooth finish.
There are about three kinds of counterbore holes:
● Standard counterbore hole: has a flat bottom.
● Reaming counterbore hole: reamed for specific sizes and tolerance.
● Special-purpose counterbore hole: for particular application.
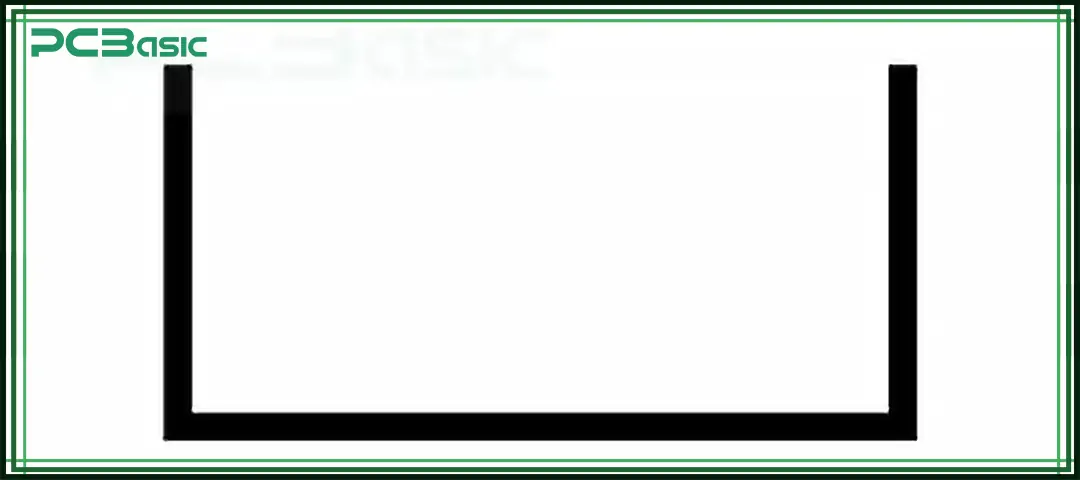
The American National Standards Institute (ANSI) shows the counterbore symbol as a circle with a smaller circle inside, as seen from an overhead view. More commonly, the counterbore symbol like in the image above. The ANSI’s representation of a counterbore hole surfaces in engineering drawings such as the one below.
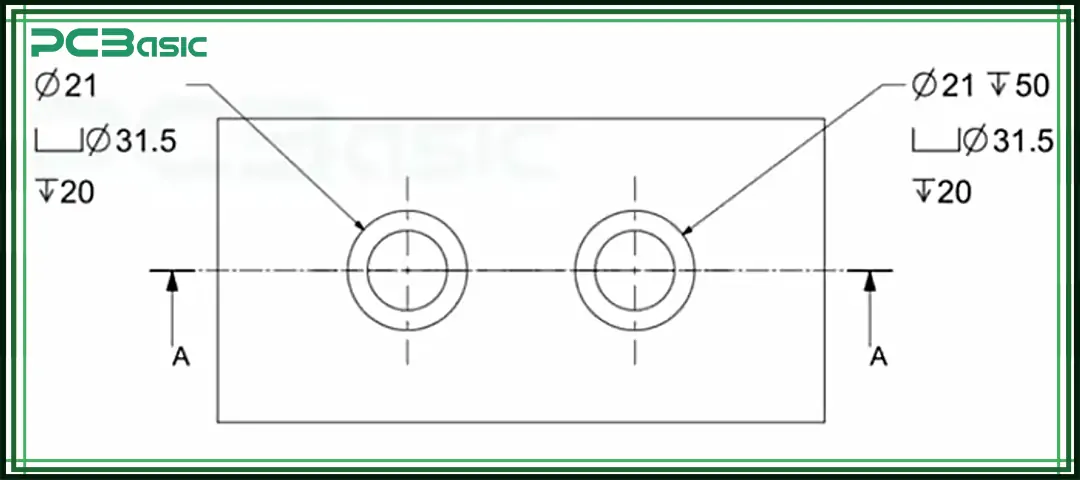
The outer circle represents the counterbore, and the inner circle represents the pilot hole.
The drilling requirements for a counterbore have four components:
● The pilot hole
● Depth
● Angle
● Tooling.
According to standards, counterboring should only come after drilling a pilot hole. This is essential to avoid cases of misalignment, which can make the drill bit wander. Non-compliance with this standard can lead to wrongly bored holes, damaged materials, or a rough job.
The standards also state that the depth of the counterbore must be equal to the thickness of the fastener head. Of course, this is after taking the desired clearance into account. It results in a well-fastened bolt and a neat job.
The counterbore’s angle is usually 90 degrees, except for cases that require a specific application. In those exceptional cases, professional knowledge and experience leads.
Counterboring tools include counterbore bits, reamer bits, and spotting drills. Each tool completes different phases according to the professional’s preferred workflow.
A countersink is functionally different from a counterbore only in the opening circle. A countersink has a cone-shaped hole drilled into a material. Industrially, it is a conical (cone-like) hole drilled into any functional work material to create an allowance for a fastener’s tapered head. E.g. flat-heads or Phillips-head screws.
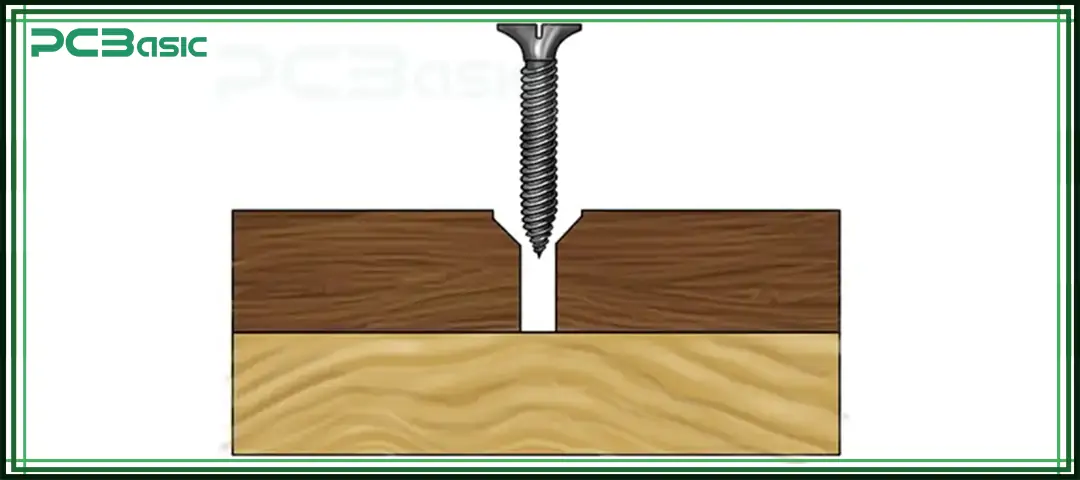
It serves the same purpose as the counterbore: to create a clean, smooth, and aesthetically pleasing finish. It also has a wide range of use cases in various industries like construction, manufacturing, and the automotive industry.
There are two functional types of countersink holes:
● Standard countersink holes
● Special countersink holes
As the names imply, the standard countersink hole comes with 82 degrees or 90 degrees, while the particular countersink hole comes in different variants, like 90 degrees for Torx screws or 82 degrees for Phillips-head screws.
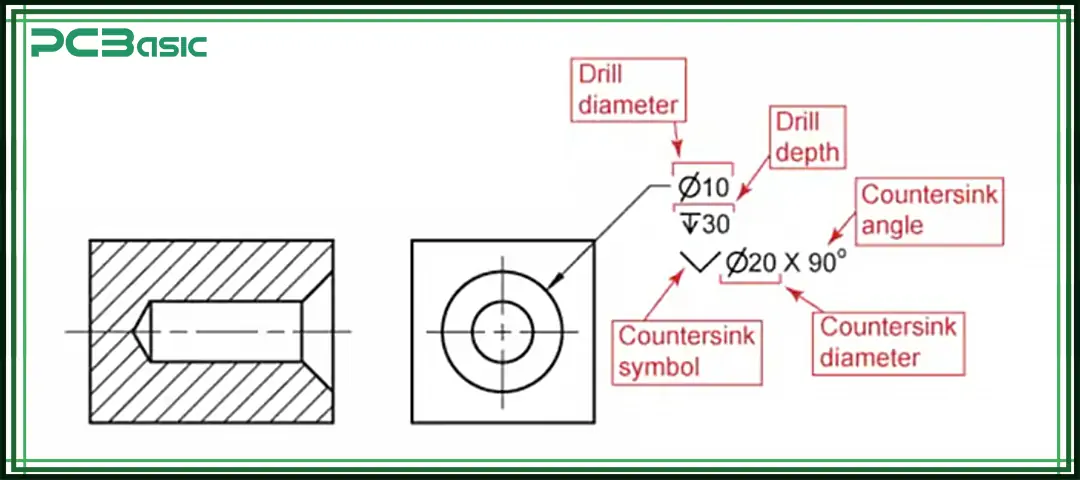
From the ISO standards in the 20th century till modern times, the countersink symbol has undergone a few notable changes. The overhead view shows two circles like the counterbore. However, the diameter between both circles is different for both holes.
The primary element of the countersink symbol is a triangle. The triangle signifies the clinical shape of the countersink hole. It corresponds to the countersink’s angle.
 About PCBasic
Time is money in your projects – and PCBasic gets it. PCBasic is a PCB assembly company that delivers fast, flawless results every time. Our comprehensive PCB assembly services include expert engineering support at every step, ensuring top quality in every board. As a leading PCB assembly manufacturer, we provide a one-stop solution that streamlines your supply chain. Partner with our advanced PCB prototype factory for quick turnarounds and superior results you can trust.
The drilling requirements of a countersink hole include the following:
● Pilot hole
● Countersink angle
● Depth
● Tolerance
● Material Consideration.
The pilot hole is the starting point for the countersink drill, helping it guide the drill bit accurately. The pilot hole’s diameter must always be equal to or slightly smaller than the fastener’s diameter. While drilling, the pilot hole must allow for sufficient material removal during the countersinking process.
Countersink angles must always match the angle of the fastener head. Commonly used angles are 60 degrees, 82 degrees, and 90 degrees. It must also be accurately drilled to avoid a distorted appearance.
A countersink should be drilled until the fastener’s head sits flush below or with the material’s surface; however, it’s essential to avoid drilling too deep. It could lead to excess material removal and ultimately weaken the material in use.
Drilling must be precise to ensure the fastener sits securely, helping the finished product meet all requirements aesthetically and quality-wise.
Finally, consider the toughness of the material. Exerting too much energy on softer materials could damage them or result in a rough job overall.
Bonus Point:
● Coolants are necessary for high-speed drills
● Apply cutting fluid when necessary
● Clamp the workpiece securely before commencing the drilling process.
Here’s a counterbore vs countersink table that shows the difference between countersink and counterbore.
|
Features |
Counterbore |
Countersink |
|
Hole’s shape |
Cylindrical & Flat bottom |
Conical |
|
Angle |
90 degrees. |
Matches fastener head’s angle |
|
Use case |
Flush or below-surface mount |
Countersunk |
|
Symbol |
Circle with a smaller circle or ⌴ |
A triangle with a circle |
|
Fastener heads |
Flat |
Tapered |
|
Drilling requirements |
Pilot hole, depth, 90-degree angle. |
Pilot hole, countersink angle, depth. |
|
Common applications |
Socket head cap screws, fillister head screws |
Flat-head screws, Phillips-head screws. |
When comparing counterbore vs. countersink, ignoring their use cases is impossible. Knowing the best scenarios for using the counterbore hole or the countersink holes might make all the difference.
Here are some factors to consider while picking.
Available fastener type
Consider the available fastener type. Sometimes, both counterbore and countersink can be functionally similar. In such cases, it is unnecessary to go the extra mile to get one instead of the other.
Overall desired appearance
Either counterbore or countersink can work depending on the product’s intended appearance; however, it’s not advisable to use both on one project. The product might turn out unattractive to clients who pay attention to details.
Functionality
To ascertain the functionality, you’ll have to factor in size, shape, and drilling angle into the equation.
Industry standards and guidelines
Every industry has specific guidelines that must be strictly adhered to. As much as professional input is essential, following laid-down principles is pivotal to maintaining employment status.
Except in rare cases, there are no wrong answers when choosing counterbore vs countersink. It often comes down to the few factors enumerated within this article. Feel free to bookmark this page and return to this article whenever the occasion calls.

Assembly Enquiry
Instant Quote
Phone contact

+86-755-27218592
In addition, we've prepared a Help Center. We recommend checking it before reaching out, as your question and its answer may already be clearly explained there.
Wechat Support

In addition, we've prepared a Help Center. We recommend checking it before reaching out, as your question and its answer may already be clearly explained there.
WhatsApp Support

In addition, we've prepared a Help Center. We recommend checking it before reaching out, as your question and its answer may already be clearly explained there.
